Assembly and Operation
of Overhead
iPad Stand for Bed and Sofa


Assembly and Operation
of Overhead
iPad Stand for Bed and Sofa
Operation
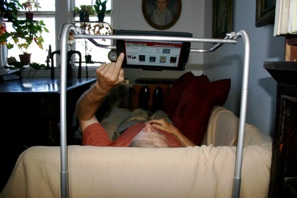
The base of unit should go under the head of your bed or sofa.
Add vertical telescoping tubes between mattress and headboard (if present).
Add lectern to top of telescoping (adjusting) tubes.
Insert iPad and case, if any. Add foam tape, or Velcro, or cardboard, if necessary, to make a snug fit.
Swing lectern up and over the stand to get it out of the way.
Lectern section can be easily lifted off for storage, whenever desired.
Top riser sections can be unsnapped and removed, as well, if desired. Leave base in place, under head of bed.
When the device is properly adjusted, a person's relaxed line of sight should fall on the center of the iPad screen.
Your relaxed line of sight is what you focus on when you wake up in the morning, lying on your back. Normally, you will be looking somewhere on the ceiling. You are not looking over you nose, or the lower part of your eyes. Doing so, will cause strain on the eyes and neck. Instead, your eyes are relaxed and there is no eye strain.
The idea is to move the iPad Holder up or down, and or to move yourself up or down the bed or sofa, so that your relaxed line of sight is in the middle of the iPad screen.
You also want to tilt the screen so you are looking at the screen head on.
It is also very important not to have your neck bent. Otherwise, you will also get neck strain. Your head should be positioned on your pillow the same way you were sleeping, or resting, on your back. Your neck should not be raised up very much from the plane of your back extended towards your head.
Adjust the height for proper focus, with or without glasses.
In other words, do not bend your neck, or read over the lower part of your eyes.
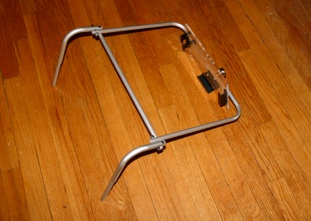
1. Remove lectern from box (top left photo). Unfold it to look like the photo just above. This lectern is the top section of the iPad Stand, and it will fit into the top of the floor stand, after the floor stand is assembled.
3. Locate second riser sections as shown above. These are telescoping risers. See photo above.
4. Snap the larger end of each riser over the snap button at the top of the first tubular riser, so the base and risers look like the picture below.
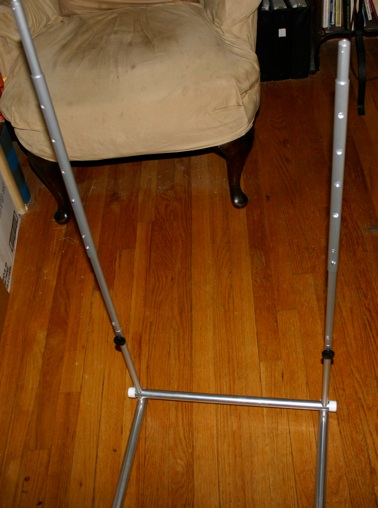
5.Adjust the top sections so they are equal in height, and at the desired elevation, and then add the lectern section. See assembled unit at top.
Note on Pressing Snap Buttons: If you have any trouble pressing in a snap button, lay the barrel of a ball point pen across the tube and on top of the snap button. Then press your thumb down on the barrel of the pen.
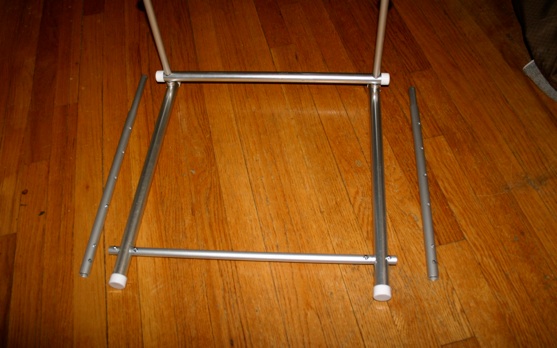
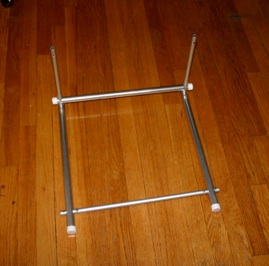
2. Locate base of stand, which is completely assembled (see photo above). On the left and right sides of the base are taped a separate riser tube. Bolt each of these tubes to the corresponding vertical riser of the base, using the following directions. Un-tape the left tubular riser from the base. Now remove the left black knob on the riser rod at the back of the base (1/2” diameter rod about 4” long). Next, insert the left tubular riser (15”) over the left riser rod. Then screw the black knob back in place into the short riser rod. Repeat this for the right side.